
Week Two
- Jan 13
- 7 min read
Updated: Jan 26
Blog posts arranged newest to oldest.
To-do:
Create dark clouds
Work on dark to light cloud transition
Create wispy particle trail on ring
Work on cloud material
Mentor Feedback:
Be careful for scale for all of the shot!
Flower scene– keep the environment simple, don’t make it overly detail
Maybe go macro in the flower scene as well since the other shots are also macro
Macro photography with shallow DOF
Find elegant ways to transition into each shot
Figure out timing of the camera moves and make sure the speed of all the shots make sense
Lay out color palette together and make sure they follow a color script and are cohesive
Find similarities in the shots and see what connects them to
Here is our submitted presentation for week 3 critique:
1/17/26
I continued working with the clouds and camera today and was able to create this previs for Shot 3:
The camera and shot needs to be slowed down for the official previs cut for the week, as this is moving far too fast right now.
So far, I am using multiple cloud shape generates to create this look of the calm and bouncy clouds. I am also using VDB clips to make sure that I am only simulating the parts of the cloud that are on camera.

Since lighting clouds and creating their materials is such a huge part of the FX, I will be lighting and shading the clouds for my shot, instead of Noelle doing it. She will still be helping with lighting specifically the ring and with any issues with lighting that come along with the ring being a larger size in this shot.
I also updated the contact sheet after feedback, choosing images with much less color to match the minimal aesthetic we are going with:

1/16/25
I began working on the new shot today, playing around with how the ring falls, teaching myself the cloud tools, doing scale tests, and playing around with the camera.
Since the clouds will by shifting half way through the shot form dark and stormy, to puffy and dreamy, I decided that the fall of the ring should also shift. I plan on having the ring free fall while the clouds are dark. I plan on the ring gliding down when it turns to dreamy clouds.
For the ring fall, I played around with three different methods:
Animating the ring on a curve
Using an RBD
Using a popnet
Right now, animating on a curve was able to best capture the idea in my head for the ring gliding down.
After testing, I plan on using a popnet for the ring falling effect. Since the fall won't be physically accurate anyways, a popnet gives me much more control than an RBD. While the animating on a curve looks the best right now, a popnet will be much more natural and smooth in the end.
When looking into how to create the clouds for the shot, I found a few really useful tutorials I will be using going forward:
Tutorials:
For clouds tools:
Fir clouds tools and rendering:
For cloud rendering:
I then began testing the different tools used for creating clouds such as the cloudshapegenerate node and the skybox node.
Cloudshapegenerate test:

Skybox test:

Overall, after exploring Houdini 20's new cloud tools, I feel excited and confident to do this shot.
The next thing I wanted to test was the scale issue. Most simulations in Houdini require the objects to be to scale. The problem is that clouds are huge and the Oura ring is very small.
One test I did was keeping the clouds right size but keeping ring super up close to the camera. What I don't like about this is how obvious it is that the clouds are far away. I don't want the clouds to feel like a background but rather something close to the ring and surrounding it.
I also tested making the clouds very small. When doing this, even when the density is adjusted up, it still does not have the same detail or same look of a cloud. Clouds look the way they do because they are so big and dense.

After doing tests and asking for professor input, I have decided to priotize the scale of the clouds, keeping them large. I will then scale the ring up for this shot in order to get the cloud look that I want.
Lastly, I played around a bit with how the camera will pass through the clouds for the shot, referring to references in my blog post from yesterday:
1/15/25
Today, the group continued discussing the new shot idea and what we wanted for it. We landed on having the clouds represent not blood oxygen levels but rather to show the stress detection use of the ring. To do this, we'll have the ring fall through darker, stormy clouds first, and then fall into light, bouncy clouds.
We also continued to think about how the camera would move in this new shot. Wren came up with the idea of having the camera track the ring as it falls and for the transition, have the ring fall through clouds.
I really loved this video and started looking up reference for this type of camera shot where the lens is covered momentarily by the haze of the fog.
First, I found some references through skydiving video.
I found this video where the camera goes through the clouds at 1:23.
I also found another good skydiver video from reddit where the camera falls through the sky:
I then found some references of this camera effect in films.
This clip from "Avatar" shows the effect at 1:55.
The effect can also be seen in this clip from "Mission Impossible" at 0:20.
Right now, I plan to create this look by having the CG camera move through the simulation, though it may need some help from comp as well to be really controlled.
1/14/25
After spending some time last night trying to rework the flower shot, and trying to think of ways for it to work with my group members today, I started hitting a wall with this shot. Water and cloth are both one big thing while I can't think of a way to do the flower shot without multiple flowers. After thinking for a while and using AI, I still was hitting a wall. I started thinking of other options for the shot, and that is when the idea hit me to do clouds. They fit really well with water and cloth, and would tie into the function of the ring since the rings measure blood oxygen levels. Going forward with this idea, I started looking at some reference from Pinterest.com:


I think this overall aesthetic might fir a lot better with the other two shots. On top of that, Wren brought up a good point that if we do clouds, then water, then cloth, the ring could be continuously falling from the sky. This would be a really good way to tie the shots together, like the mentor's emphasized on pitch day.
I went into Maya started working on a couple ideas for how this shot might work. I envision the ring continuing its fall from the previous shot and down into clouds. the clouds would slightly move to allow for the ring to enter. I don't want a huge emphasis on cloud interaction here as I don't love the look of the ring just falling into a dense cloud and disappearing. I would rather an opening appear.
After this shot, it would cut to the ring float falling in the clouds. The movement would be very airy and dream like. I envision the ring moving in a circular motion at one point while it falls.
Along with the clouds, I like the idea of the ring having a soft wispy trail, like some of the reference images pictured above. This would push the aesthetic and the idea of the oxygen monitoring.
Contact sheet for the idea:

1/13/26
Today was pitch day! Unfortunately, I couldn't be at the pitch with my group because I had a shoot at the SCAD XR stage on the same day that was booked in advance. I let my team know in advance and gave them speaker notes on behalf of my shot. From what I hear from my team, the pitch day went great! Here is the feedback we received from the mentos:
Beck
Good job keeping effects contained
Pay attention to refraction on bubbles and the physics of it
Be careful for scale- vellum can also be used for small scale fluid sim
Billy
Good shots with intention
Kyle
Flower scene– keep the environment simple, don’t make it overly detail
Beck
Maybe go macro in the flower scene as well since the other shots are also macro
Stephan
Macro photography with shallow DOF
Kyle
Find elegant ways to transition into each shot
Molly
Figure out timing of the camera moves and make sure the speed of all the shots make sense
Kyle
Lay out color palette together and make sure they follow a color script and are cohesive
Pheya
Find similarities in the shots and see what connects them to
With the biggest critique being to change the flower shot into a macro shot to fit in with the others, I got to thinking on how we could shift it. I have two ideas right now that I want to further discuss with the group tomorrow.
The first idea would be to have the ring roll in and out on a branch. There would then be peonies coming in from the corners of the shot, possibly even just 2-3, to keep it simple. I used references and Google Gemini to come up with these concept photos:


Here are the non-AI references I used from Pinterest.com


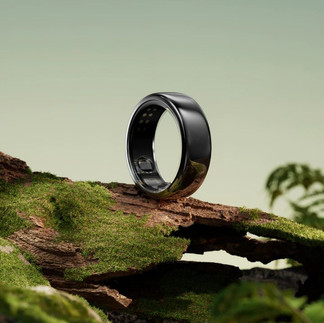
My second idea would be to have the ring fall from the sky and land straight onto a leafy or mossy surface. The water droplets from the previous shot could fall down with the ring and land on the ground. There would then still be peonies in the top right and bottom left of the image.


I'm liking the way both of these shot ideas could go. I think the struggle comes from finding the transition from one shot to the next and how the ring enters and exits. This will be the main thing to talk over tomorrow with the group!


